Sunday, June 29, 2014

FINISHED: Hollyhock Linen Zinnia

I love the names given to colors, and this linen is no exception: Hollyhock. I bought this from Fabrics-Store.com and have been a fan of their linens for some time. This was my first time trying the lightweight linen and I think it works beautifully for a skirt like the Zinnia from Colette Patterns.


This color is Hollyhock, sadly no longer available. I knew that the fabric was too lightweight and semi-sheer to stand alone without a lining (say, as a dress), and the pleated version of Zinnia might sag with the weight of the pleats, so I went with version 1. Version 1 has a button placket unlike any I've seen. The fabric folds in on itself and is then top-stitched rather than attaching a facing that then folds. This placket is not interfaced and lacks the structure of a placket you'd see in a collared shirt. I'm not sure I'm 100% happy with the weight of it, and am considering ways to beef it up for future versions.
 
I do love the flare of the skirt and for that reason I've made several of these cut on the fold without the placket - you still get the pouf at the waist and flare at the hem without the placket down the front.
 

This version came together quickly and used 2 yards of linen. I had some heavy duty buttons in grey that worked well.
 
 
Linen wrinkles. It's just a fact of life that you have to accept it if you choose to work with the fabric. I love the way the fabric breaths in hot weather, how it floats in the wind, and that I can toss all of my linen makes into the washer without fear.
 
I did notice that the waistband on this version, which is the same size as my pleated Zinnias, feels more snug. I'm not sure if I made an error with the placket and buttons or what, but there's definitely less ease in this waistband compared to my others. I find I need 1/2" of ease at the waist and more if I'll be singing that day.
 
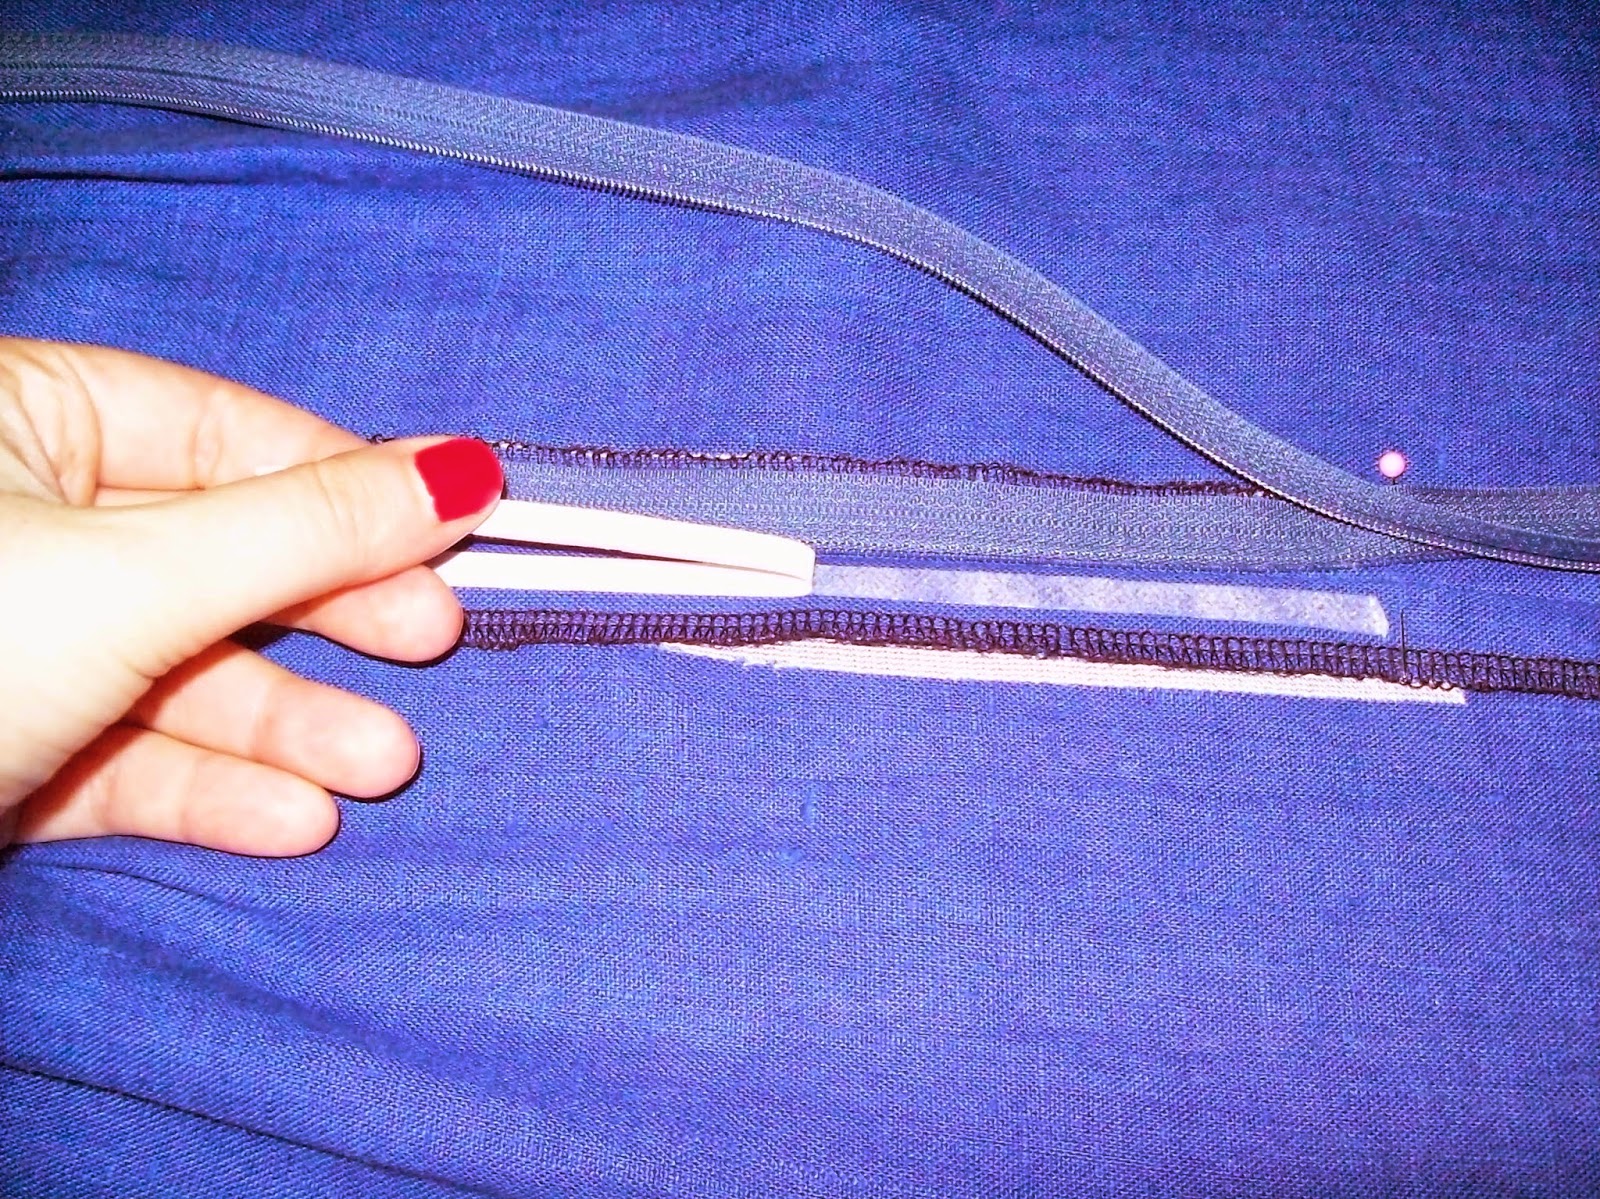
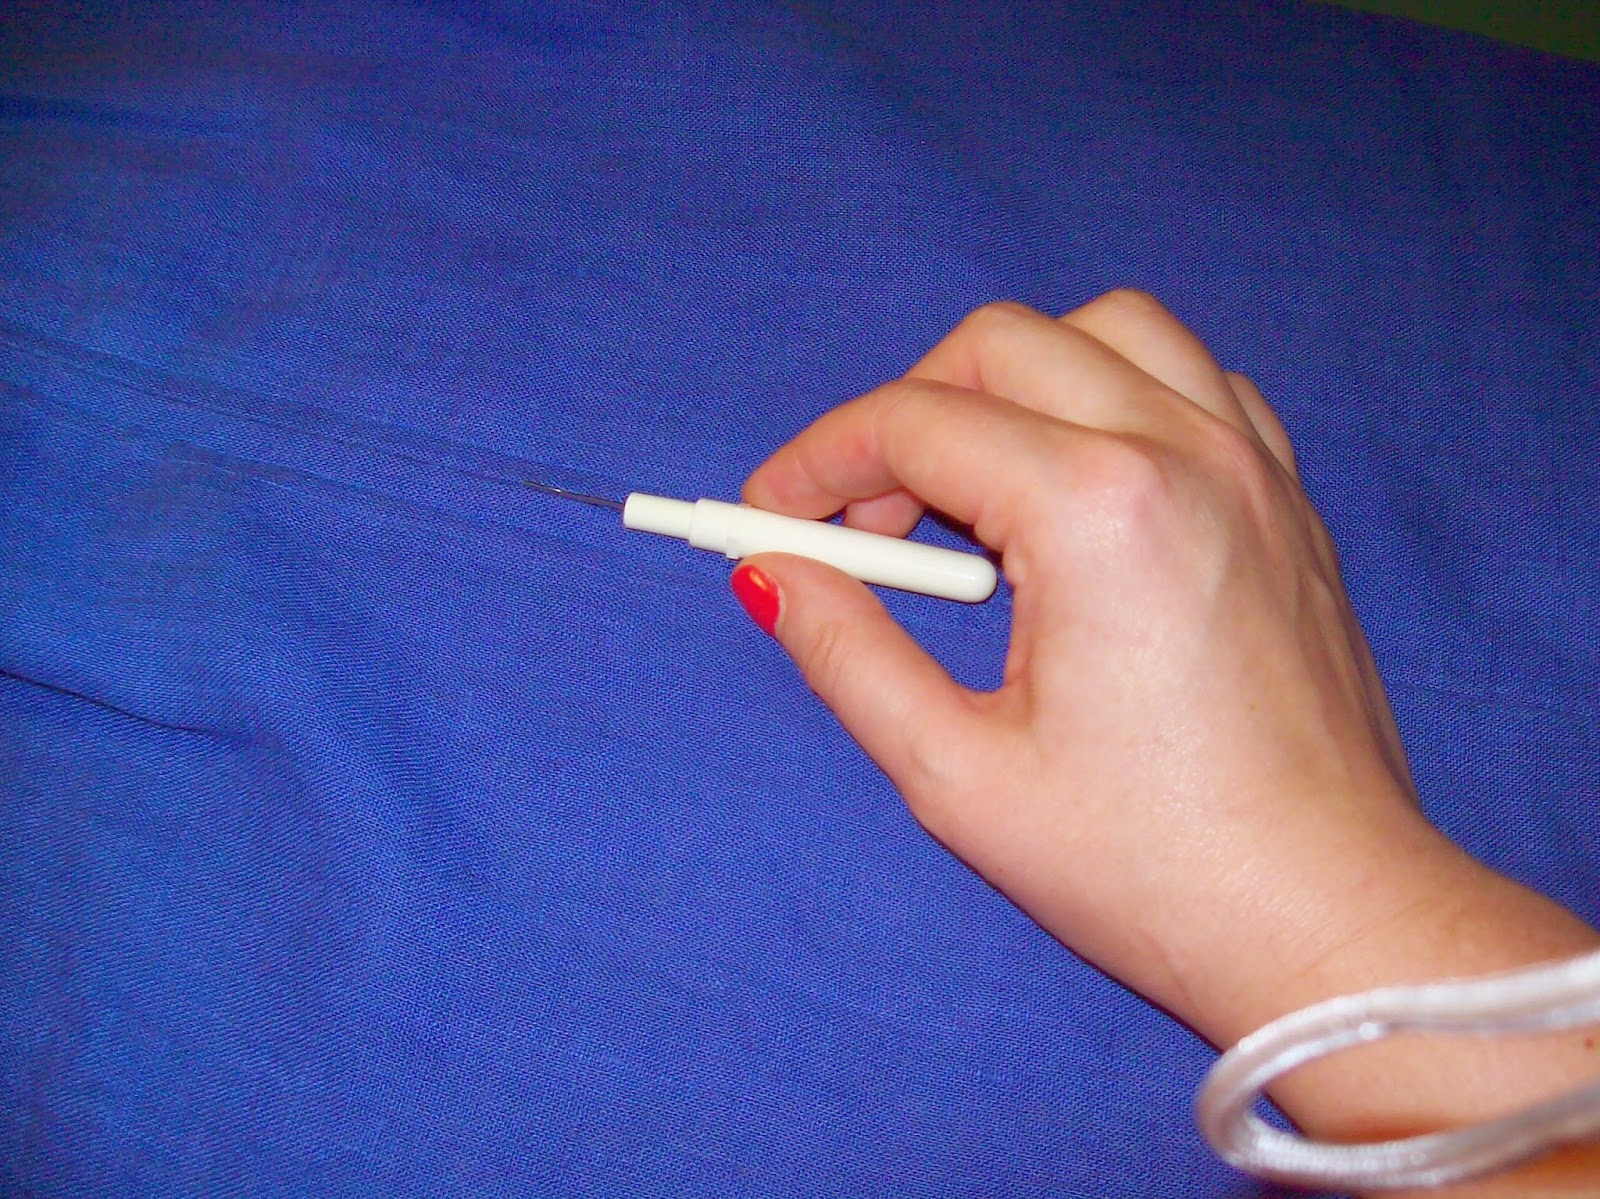
I did make one giant oops on this garment, which you can't see in the photo of me wearing it:
 
 
This just goes to show you that it doesn't matter how long you've been doing anything, mistakes are inevitable. I measured all around this to cut off the bias stretch and then found this. I liken this to completing a dress and zipping it up only the find the zipper doesn't match at the top (which I still do from time to time.) 
 
Are these the kinds of things that give our handmade garments character? Do they say, "This garment was made with love!"? This reminds me that no matter how often I sew (which is everyday) or how long I've been sewing (three years), I will make mistakes. The perfectionist in me hates this, but she's learning to let it go.
 
Pattern: Colette Zinnia
Size: 14 w/ length removed
Fabric: Hollyhock lightweight linen from fabrics-store.com
Needle: Schmetz 70/10 Micro
Thread: Gutermann Mara 100
Changes: Removed 4" length to 22" from waist

Wednesday, June 25, 2014

FINISHED: Blue Linen Chardon

I found myself on a sewing roll during May. Part of it was the motivation of Me Made May to wear handmade everyday, but the other part was my goal to sew down my fabric stash. If I have too many fabrics at once I tend to feel overwhelmed and find it hard to start projects. Having a smaller stash helps stay mentally focused.

I knew I wanted another Chardon skirt by Deer & Doe for spring, and I had just received a large order of linen from Fabrics-Store. I determined late last year that I only need to purchase fabric in what I consider to be my colors (blues, greens, purple/magenta, neutrals) and so I ordered 3 pieces of blue linen, all relatively the same color but slightly different. I can't remember which color this is, but it's medium weight and either royal blue, strong blue or olympian blue. Pardon the Me Made May photo. :-)


I added 1 1/2" of length to this version after finding my plaid wool version a bit short. I can't tell that it made that much of a difference to be honest. After making this version I went back and added some extra ease to the waist for more breathing room. The pleats do not release right away so there's a fair bit of structure up there.


I stitched the pleats using a triple stitch which I found to be more durable that a regular straight stitch. I may go back and top-stitch these the more I wear it.


I used a centered zipper. For some reason it ended up being shorter than I wanted (how does that happen?!) so I have to shimmy to get this one on. 


I used lightweight fusible for the facing and used an overcasting stitch around the edges rather than folding up to reduce bulk. I also stitched in the ditch of the pleats to hold down the facing.


Simple hem with Gutermann Mara 100 thread.


Linen wrinkles, ya'll, but I just love it. I love the rich colors and how it feels against the skin. I remember putting on a polyester garment one day after having worn natural fiber garments - I literally felt suffocated. I will take wrinkles any day over wearing synthetics. 

Pattern: Jupe de Chardon by Deer&Doe
Size: 46 plus ease added
Fabric: blue medium weight linen from Fabrics-Store
Thread: Gutermann Mara 100
Needle: Organ 80/12
Changes: length of version with band + 1 1/2" length; ease added to size 46

Sunday, June 22, 2014

FINISHED: Colette Moneta

My husband and I are leaving today for a 12 day trip - we'll be at Lake Junaluska for Worship & Arts Week until next Friday, then we'll head home to Knoxville, TN to visit family and friends. This is the longest we will have been away from home EVER. I have to admit that visiting family isn't exactly my idea of vacation, but I'm looking forward to the trip nonetheless.
 
I am proud to say that only a small handful of the garments in my suitcase are RTW - everything else is me made! There's something fun and rewarding about packing a suitcase full of handmade lovelies!
 
Since we're leaving right after church (and will be in the car 6 hours) I knew I needed something comfortable yet stylish yet sing-able for today. Enter the Colette Patterns Moneta.
 

I bought this after the patterns and book had been released, and purchased the bundle from Colette Patterns (well worth the cost I think). My knit repertoire had mainly consisted of Coco from Tilly & the Buttons which is really the knit version of the Laurel shift dress (10 versions I have yet to blog). Coco is stitched by machine, but Moneta and Mabel really take your knit sewing skills up a notch.
 
The accompanying book, The Colette Guide to Sewing Knits, is really fantastic and assists you with taking your knit garments to the next level. I'm happy to say that my knit sewing has been expanded to include Mabel and the Nettie bodysuit.
 

Twin needles still scare me so I used a 2.5/2.5 zig-zag for the hem and sleeves. Tilly recommends this stitch for Coco and I rather like it. It's large enough to look decorative and stretch, but not so "I made this" looking. I do, however, have my eye on a coverstitch machine. :-O


I busted out the twin needle for the neckline, although this photo stinks. It's a nice technique - just watch your stitch line if you're using contrasting thread. You have to be nice and even otherwise it shows.

My one source of panic is using the clear elastic. JoAnn's didn't have 1/4" (but Wawak did!!) so I had 3/8" for this and I might prefer it. I feel like I have more room to work with. Stitching along 1/4" width of elastic is a bit taxing - doable but taxing. For this Moneta I attached the elastic to the skirt and then attached the rouched skirt to the bodice. My most recent attempt was to gather the skirt, then attach the elastic while attaching the skirt to the bodice. This ended badly and I now have a cropped bodice and a shorter skirt due to a serger incident. I'm hoping I can salvage it.

The fit was spot on - I followed my usual size for Colette Patterns (12/14) and made the size large. It fits beautifully. The fabric is coral ponte from Girl Charlee. The weight and stretch is really nice for this pattern, although for Mabel it's a bit light. I made a Mabel in the red colorway of this ponte and basically doubled it and it works well.

The fabric claims to be cotton/poly/spandex and I think this is accurate. It breaths nicely.

I want to make this again, but the elastic bit has been scared.

Pattern: Colette Moneta, 3/4 sleeves
Size: Large
Fabric: coral ponte from Girl Charlee
Needle: Schmetz 75/11 Stretch; regular twin for topstitching
Thread: Maxi-Lock in white for seams, white Gutermann for hems
Changes: Used 3/8" clear elastic out of necessity, no others


Do you have any tips or tricks when using elastic?


Thursday, June 19, 2014

FINISHED: Coco by Tilly and the Buttons

I bought the Coco pattern the day it came out, and I bought three striped pontes from Girl Charlee the same day, and, of course, waited a few more months before actually making one. I really wish I'd made Coco sooner seeing as how it is the perfect transitional dress.


My muslin was a straight size 7, but what I ended up with here is a straight size 6. Remember that knits, even pontes, have some stretch in them. I went back after this version though and took the skirt A-line down to a size 5 to reduce it a bit.

This green version is a size 6 but tapered to a size 5 to reduce that hem curve. I also reduced the sleeved to 3/4 length. I thought the long sleeves bordered on nightgown, but I'm not sure. I also added the collar with the stripes running vertically. I might eventually add in the length I removed.


I used my machine zigzag stitch on .5 width, 2.5 length as suggested by Alyson Clair in The Colette Guide to Sewing Knits and it worked beautifully. I would recommend samples with various needles and stitches anytime you're working with a knit. I used a 2.5/2.5 zigzag for the sleeve and skirt hems per Tilly's instructions.


The instructions have you stay-stitch the neckline, then apply some stay tape when you hem, which I liked. In the future, I'll go ahead and fuse the knit stay tape to the neckline, sleeve hem and skirt hem before construction since it's easier than applying it in the round. I also added knit fusible to the collar but it literally had no give when I attached it to the neckline, so I might omit that next time.


I used kelly green Toldi-Lock thread from JoAnn based on Alyson Clair's recommendations. I had never considered why you might need to use finer thread with knits, but it makes sense.

Both of these fit on 2 yards of ponte fabric from Girl Charlee. I folded both selvedges to meet in the middle to conserve fabric. I prefer to do this if able since most knit garments have both front and back cut on the fold. 


These pontes are a blend of cotton/poly/spandex so they breath a bit better. I have this fabric in royal blue as well to make a third Coco, probably 2/4 sleeves without the collar. 


Pattern: Coco by Tilly and the Buttons PDF
Size: 6, 5 from waist to hem
Fabric: Striped ponte from Girl Charlee 2 yds
Thread: Gutermann Mara 100 & Toldi-Loc
Needle: Organ 90/14 Ballpoint
Stitch: Machine zigzag .5 width/2.5 length
Notions: Fusible tricot knit from Wawak cut into strips, stay tape

TUTORIAL: An Evenly Stitched Centered Zipper


Ah, zippers.


I believe there are certain techniques that make every seamstress of every skill level bow up with anxiety - sewing knits, sewing silk, buttonholes, and finally zippers. If you make woven garments, chances are you insert a lot-o-zippers. Last year I decided to insert all of my zippers by hand. This worked well until I had a few pop out and decided I desperately needed to figure them out on the machine. I present to you what works for me.


Step 1: Enroll in Sunni Standing's Mastering Zipper Techniques on Craftsy.com. This is a free mini class that covers centered, lapped and invisible zippers as well as inserting zippers into lined garments. You may not think you are a visual learner, but sewing is a tactile sport and you need some visual support - trust me. 


Step 2: Gather supplies.


Here we have Wonder Tape, a regular zip, a fine point Sharpie and a gridded 2" x 18" clear ruler. I buy 98% of my sewing supplies from Wawak.com. They have the best prices (yes, even with a JoAnn coupon) and your order arrives within 2-3 days of placing it depending on your location in the US.

You will also need to gather some knit stay tape or strips of fusible interfacing. I use a fusible tricot from Wawak that is 2" wide. This will reinforce the seam allowances upon which you will sew your zipper.


You'll also need your trusty clear ruler as well as a rotary cutter and mat.


Step 3: Prepare your zipper opening. 

First, cut your fusible tape the length of your zipper plus a few inches or so. I'm using 20" as an example. You'll need two strips, one for each back piece.


Fold the tape on itself lengthwise.


Line up your clear ruler measuring 1 1/4" in from the edge (5/8" + 5/8" = 1 1/4"). This will cover both side of your seam allowance to which you will attach your zipper.


After you make your cut with your rotary cutter, you'll have a strip that is 1 1/4" width, and a strip that is 3/4" width. I save the latter for stabilizing necklines or sleeve hems.


I then fuse this to the wrong side of each back piece along the center back seam. Stitch your center back seam, making sure to line up your waist seam. When you press this open, the seam allowance should hide the tape.


At this point you can finish those seam allowances on the serger (or if you prefer finish everything pre-construction). Remember to apply the fusible before you stitch the center back seam. Things get sticky if you apply it after you've stitched the seam.

(If at all possible, I like to create a front (bodice + skirt) and a back (2 bodice halves + 2 skirt halves). I find it easier to insert the zipper before stitching the side seams. This is up to you. Do what you find easiest!)


Step 4: Prepare your zipper.

I stitch my zippers with the wrong side facing up, so this helps me keep my stitching in line. 


Place your zipper coils down on a flat surface. Line up your ruler 1/4" from the zipper opening. Draw a line using your Sharpie.


Continue on the other side of the zipper tape.


Make the line as neat as possible. This will be the line your stitches will follow as you sew.


Step 5: "Baste" Your Zip Using Wonder Tape

Wonder Tape is a two-sided tape that won't gunk up your needle and will wash away once you toss your make into the laundry. It's a great tool for keeping your zipper straight without pins.


Unroll the tape the length of your zipper and press onto your seam allowance.


Peel back the paper to reveal the adhesive. I usually pinch the end and it comes right off. Attached the right side of your zipper, teeth down, to the right seam allowance. For the left side, zip up your zipper and then press the left side down.


Give the zipper a nice finger press, or run a warm iron over it.


Your zipper is now ready to be stitched.


Step 6: Stitch Your Zipper


Install your regular zipper foot. My machine (Brother PC-420) has a left and middle needle position. As shown, the needle is in the left position. If it were centered, the needle would fall directly in the groove. Choose the one that works best for you. I find this one easier to use to navigate around the zipper pull.


I start at the top of the zipper on the right side, stitching along my marks on my zipper. Take your time and follow the line all the way down to the end of the zipper.


Pivot where you want the zipper to stop, and stitch over the zipper teeth. Go slowly as you move over the teeth. This is the Colette Hazel pattern. My zipper is 22" but I find 16-20" works well for this style. You can clip the tail later.


Pivot again and stitch the other side following your marks.


Step 7: Press & Rip Basting


At this point I like to press on the right side of the garment with steam. I don't linger at any one area, but a smooth press secures those stitches.


Unpick your basting stitches with a seam ripper. I just replaced mine and a new seam ripper makes the job much easier. Be sure to remove the small threads caught in the fabric.


Step 8: Admire Your Handiwork


At this point I like to unzip my zipper and clear away any loose threads, while admiring the fact that the waistlines match and the zipper looks pretty straight!

I hope this was helpful, and seeing as how it's my first tutorial, please provide some feedback. Again, this is what works for me. It's a few more steps but it ensures a nice even zipper.

Are you confident when it comes to zippers? Feel free to share your favorite tips & tricks!

Tuesday, June 17, 2014

FINISHED: Swiss Dot Zinnia + Nettie Bodysuit

Me Made May 2014 taught me a few things:
1. I have a fabulous handmade wardrobe just waiting to be brought into the world.
2. I wear handmade 95% of the time. Yesterday was the first day I wore RTW shorts and a t-shirt and that was for the chiropractor. (Can't wear a skirt to the chiropractor.)
3. I need more separates in my wardrobe!

Enter the grey swiss dot Zinnia skirt. As you may recall, I have a Zinnia in a great polka dot lawn, which I wear all the time - I wore it three times during MMM. My pledge did not include a "no repeats" clause, but I was pleased with my overall results. Please excuse my Instagram photo.


This was my first entry for #1ppw, hosted by Kath of Bernie and I. We connected via Instagram for MMM. Some of us were actually sad to see the month go by, so she created 1 Project per Week to keep us motivated. Anyway, this Zinnia is paired with my second Nettie body suit.


I had 1 1/2 yards of this fabric, and I managed to fit size 14 of version 2 onto it without folding it on the crosswise grain. (You do need to fold on the crosswise for version 1.) I do, however, cut my waistband on the fold to reduce fabric - just be sure you mark the correct notched, which is easy to do once you unfold both pieces.


The pleats were marked with tracing paper, then stop-stitched down per the instructions. And you can see my stitching-in-the-ditch a bit. Oh well. It irks me when bloggers mention that their skirts didn't meet the waistband and perhaps this is a "drafting flaw" - I personally trust the skill set of the staff at Colette Patterns. Kristen and Sarai put their patterns through strenuous testing and reviews. So, if you have issues, check that you measured your pleats properly. 


I actually had a zipper to match this fabric (thank you multi-pack from Wawak.com)! I used thread that was more blue than the fabric and I like the result. I used kelly green to hand sew the button. I'm in the process of preparing a short zipper tutorial for how I manage even zippers since I haven't always.

I've learned lately that this skirt goes perfectly with the Nettie bodysuit. They go so well together that I now have 4 Zinnias in rotation for summer, and 5 Netties. This coral one was my second go at the pattern.


My first was a gorgeous bamboo stripe knit in a kiwi color. I used my machine for construction and I'm not 100% pleased with the neck binding. I plan on buying more fabric to make another. This one, though, I constructed using my serger (except for the crotch and sleeve hem) and I'm really pleased.


I'm not the type that has a million cones of serger thread on hand, so this was constructed with white thread. I didn't pin the neck binding, I just pulled along as a went. This is a straight size 16 to accommodate my bust - I have since graded down to a 14 waist/hip/leg opening/crotch. This one sags a bit, but the ones with the grade fit perfectly. 

This is the Coral Solid Cotton Spandex Knit Fabric from Girl Charlee. As I type there are 353 yards left at $6.50 a yard. I purchased the coral, Paris green, black, Kelly green, navy, peacock and heather charcoal and I can personally vouch for all of them. They are a true medium weight and the stretch recovery is brilliant. They are not slippery like some knits and are comfortable to wear.

I have since made three more: navy, Paris green and Kelly green. All of them are cut with the scoop neck, high back and 3/4 sleeves. I find this style to be very flattering on my shape so this is probably what I'll stick with for future Netties.

My only source of frustration with Nettie is the snap crotch.


Look at that hideousness! The lining fabric is from my polka dot Zinnia skirt. My machine was NOT having the edge stitching so this looks like crap - it's a good thing no one will every see it in the light of day. I bought a Grip It snap tool from Wawak.com which came with a few snaps, but my refill is back-ordered so my most recent Netties have snap tape. Anyway, I'll figure this out one day!

Pattern: Colette Zinnia view 2
Size: 14
Fabric: Swiss Dot cotton/poly lawn from Denver Fabrics
Needle: Schmetz 70/10 Micro
Thread: Gutermann Mara 100
Changes: None

Pattern: Closet Case Files Nettie bodysuit, scoop neck/high back/3/4 sleeve
Size: 16 
Fabric: coral cotton/spandex from Girl Charlee
Needle: 90/14 on serger, Schmetz Strech 75/11 for hemming
Thread: Maxi-Lock in white
Changes: grade to 14 waist/hip/leg opening/crotch for future versions