Ah, zippers.

I believe there are certain techniques that make every seamstress of every skill level bow up with anxiety - sewing knits, sewing silk, buttonholes, and finally zippers. If you make woven garments, chances are you insert a lot-o-zippers. Last year I decided to insert all of my zippers by hand. This worked well until I had a few pop out and decided I desperately needed to figure them out on the machine. I present to you what works for me.
Step 1: Enroll in Sunni Standing's Mastering Zipper Techniques on Craftsy.com. This is a free mini class that covers centered, lapped and invisible zippers as well as inserting zippers into lined garments. You may not think you are a visual learner, but sewing is a tactile sport and you need some visual support - trust me.
Step 2: Gather supplies.
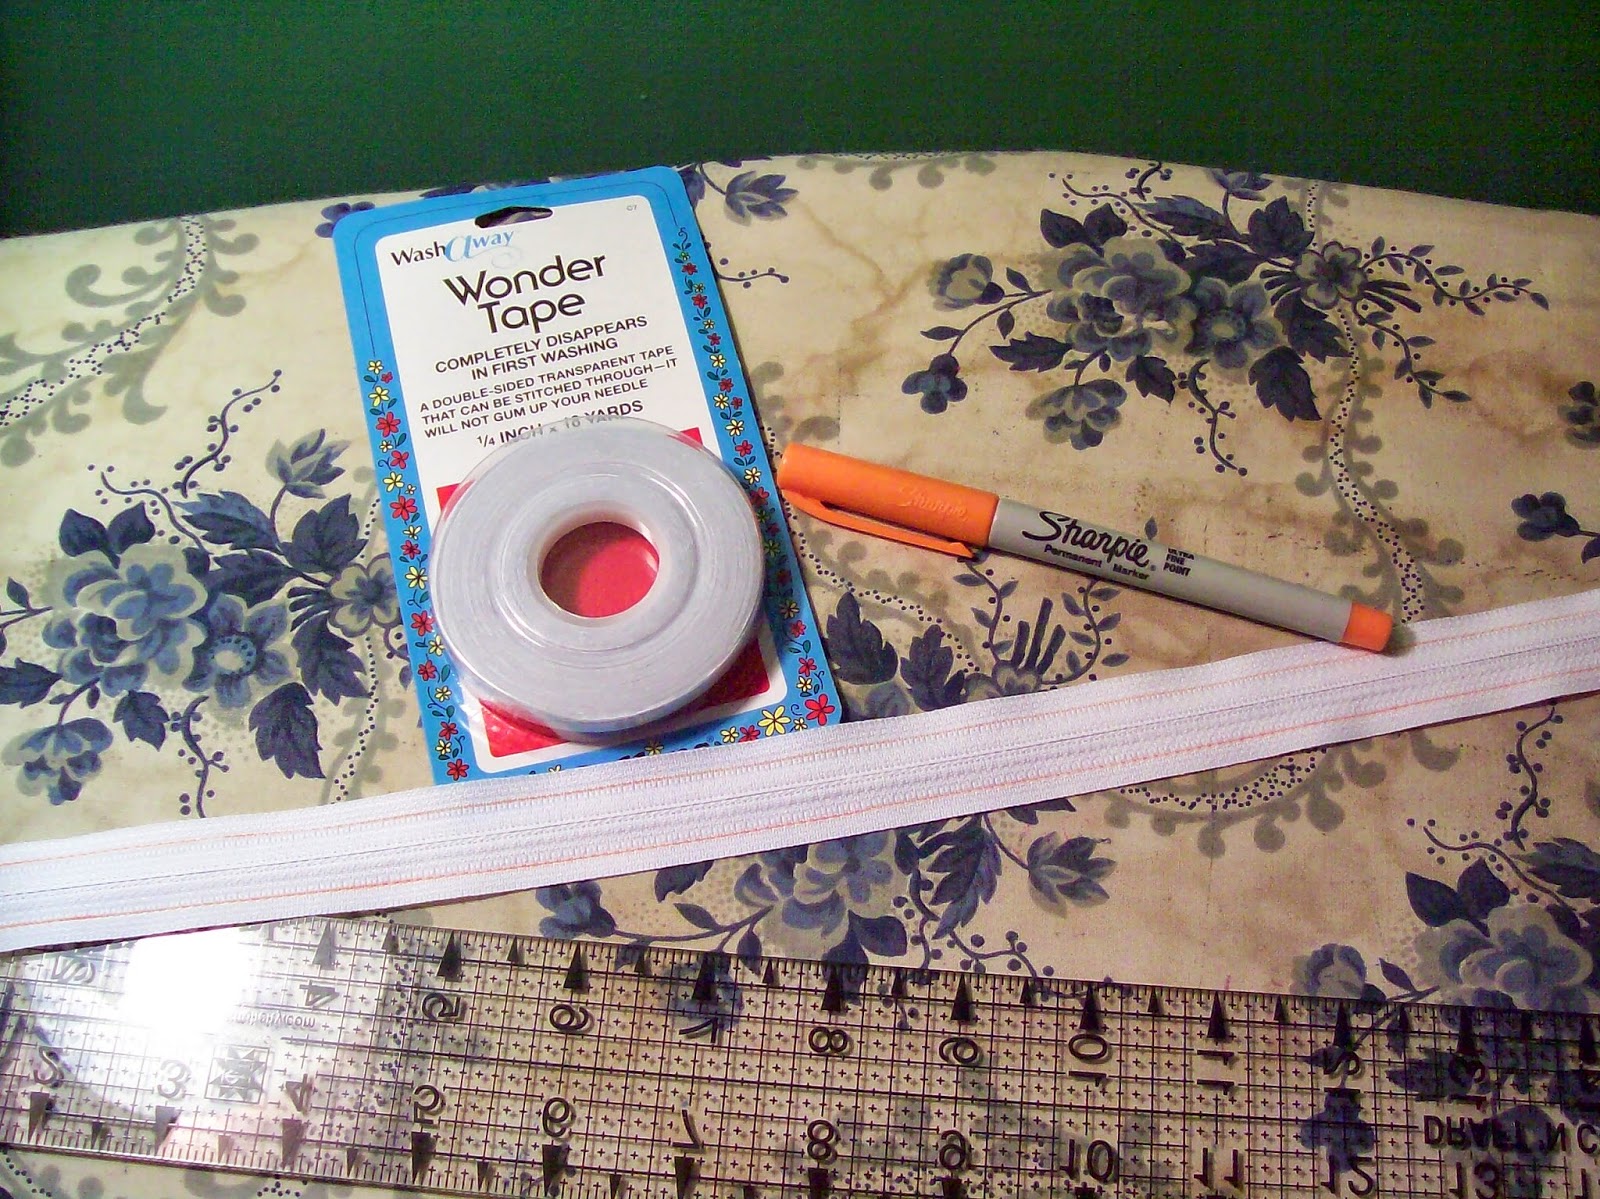
Here we have Wonder Tape, a regular zip, a fine point Sharpie and a gridded 2" x 18" clear ruler. I buy 98% of my sewing supplies from Wawak.com. They have the best prices (yes, even with a JoAnn coupon) and your order arrives within 2-3 days of placing it depending on your location in the US.
You will also need to gather some knit stay tape or strips of fusible interfacing. I use a fusible tricot from Wawak that is 2" wide. This will reinforce the seam allowances upon which you will sew your zipper.

You'll also need your trusty clear ruler as well as a rotary cutter and mat.

Step 3: Prepare your zipper opening.
First, cut your fusible tape the length of your zipper plus a few inches or so. I'm using 20" as an example. You'll need two strips, one for each back piece.

Fold the tape on itself lengthwise.


After you make your cut with your rotary cutter, you'll have a strip that is 1 1/4" width, and a strip that is 3/4" width. I save the latter for stabilizing necklines or sleeve hems.

I then fuse this to the wrong side of each back piece along the center back seam. Stitch your center back seam, making sure to line up your waist seam. When you press this open, the seam allowance should hide the tape.

At this point you can finish those seam allowances on the serger (or if you prefer finish everything pre-construction). Remember to apply the fusible before you stitch the center back seam. Things get sticky if you apply it after you've stitched the seam.
(If at all possible, I like to create a front (bodice + skirt) and a back (2 bodice halves + 2 skirt halves). I find it easier to insert the zipper before stitching the side seams. This is up to you. Do what you find easiest!)
Step 4: Prepare your zipper.
I stitch my zippers with the wrong side facing up, so this helps me keep my stitching in line.

Place your zipper coils down on a flat surface. Line up your ruler 1/4" from the zipper opening. Draw a line using your Sharpie.

Continue on the other side of the zipper tape.

Make the line as neat as possible. This will be the line your stitches will follow as you sew.
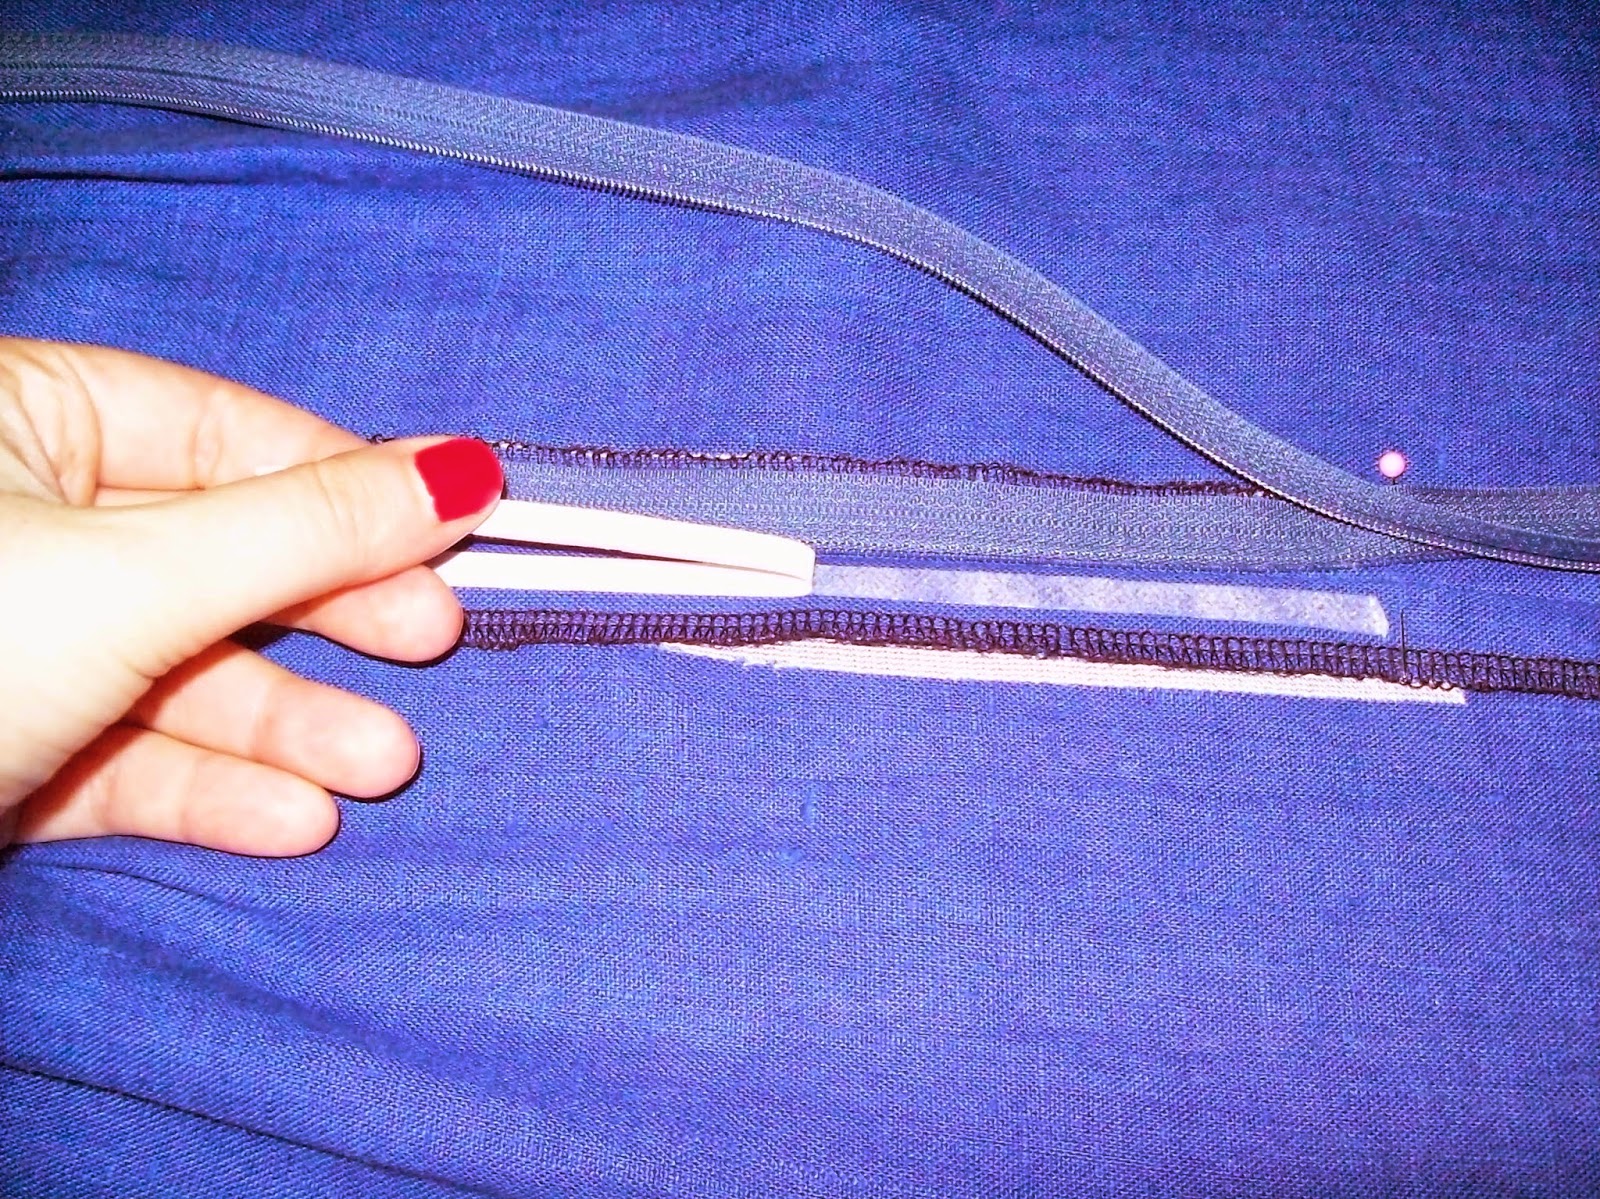
Step 5: "Baste" Your Zip Using Wonder Tape
Wonder Tape is a two-sided tape that won't gunk up your needle and will wash away once you toss your make into the laundry. It's a great tool for keeping your zipper straight without pins.

Unroll the tape the length of your zipper and press onto your seam allowance.
Wonder Tape is a two-sided tape that won't gunk up your needle and will wash away once you toss your make into the laundry. It's a great tool for keeping your zipper straight without pins.
Unroll the tape the length of your zipper and press onto your seam allowance.
Peel back the paper to reveal the adhesive. I usually pinch the end and it comes right off. Attached the right side of your zipper, teeth down, to the right seam allowance. For the left side, zip up your zipper and then press the left side down.

Give the zipper a nice finger press, or run a warm iron over it.


Install your regular zipper foot. My machine (Brother PC-420) has a left and middle needle position. As shown, the needle is in the left position. If it were centered, the needle would fall directly in the groove. Choose the one that works best for you. I find this one easier to use to navigate around the zipper pull.

I start at the top of the zipper on the right side, stitching along my marks on my zipper. Take your time and follow the line all the way down to the end of the zipper.

Pivot where you want the zipper to stop, and stitch over the zipper teeth. Go slowly as you move over the teeth. This is the Colette Hazel pattern. My zipper is 22" but I find 16-20" works well for this style. You can clip the tail later.

Pivot again and stitch the other side following your marks.
Step 7: Press & Rip Basting

At this point I like to press on the right side of the garment with steam. I don't linger at any one area, but a smooth press secures those stitches.
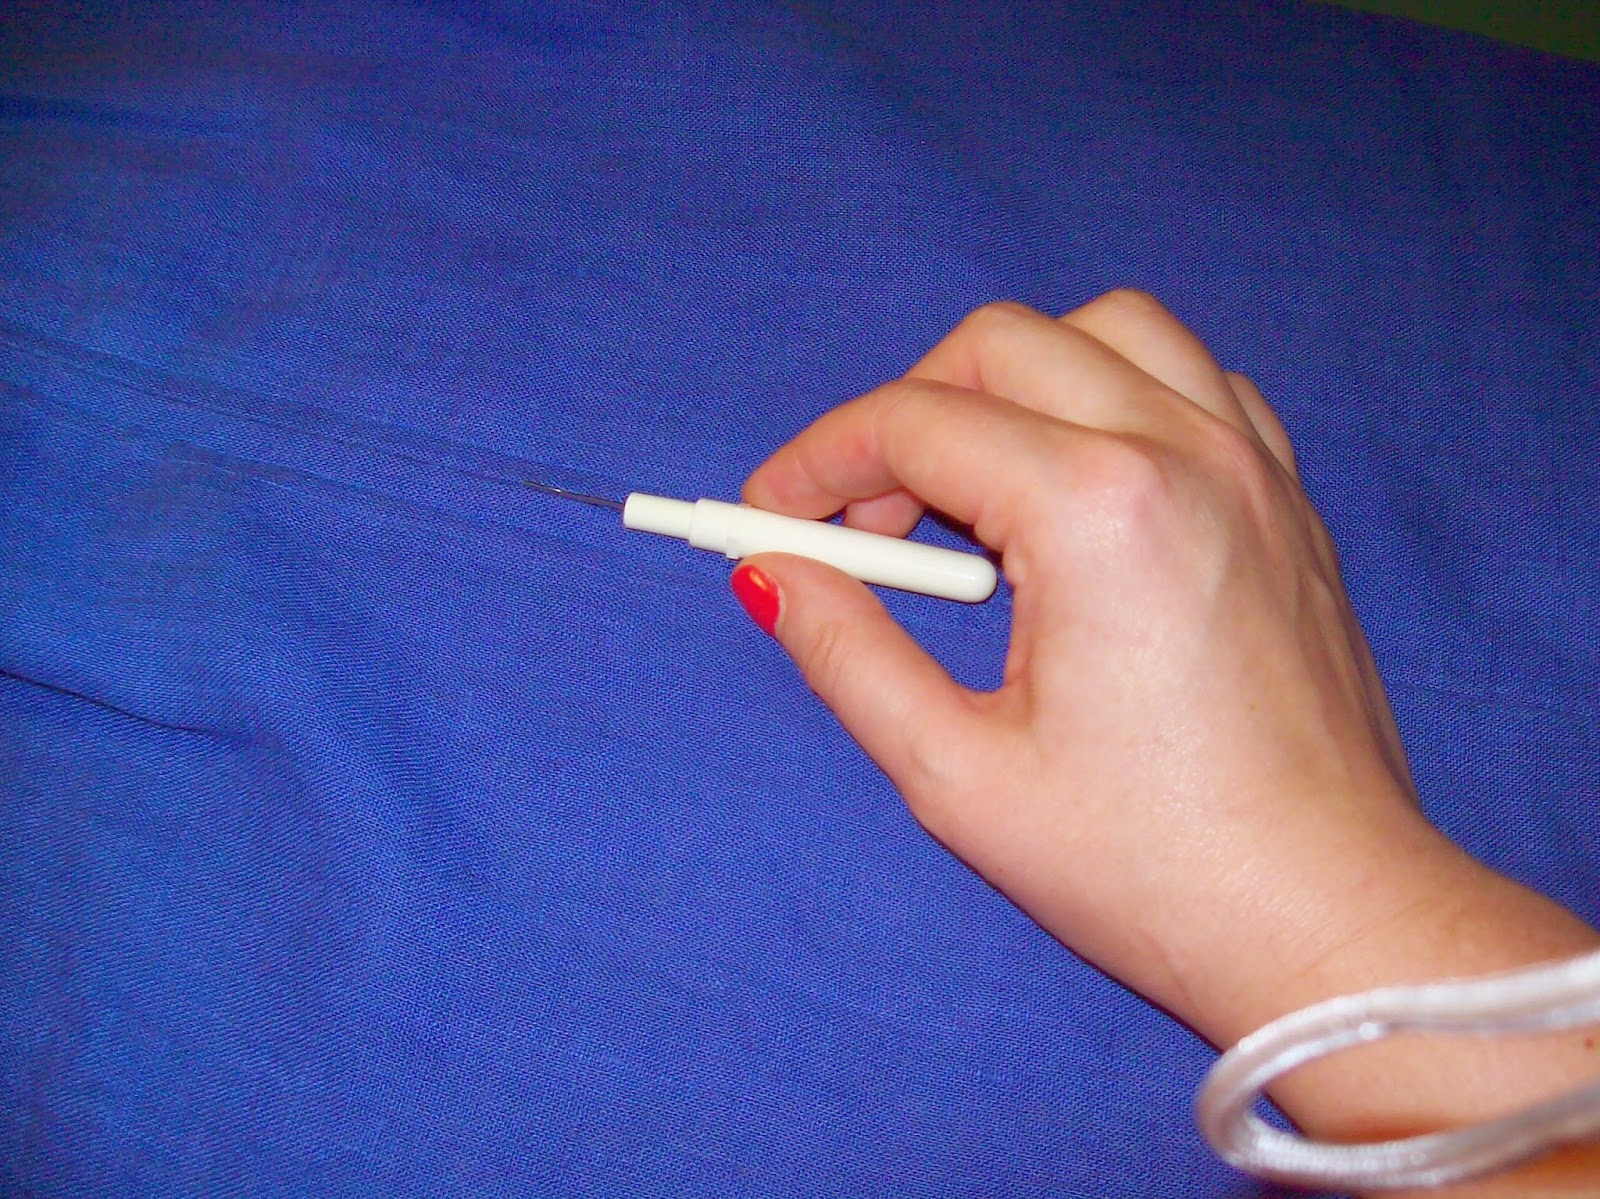
Unpick your basting stitches with a seam ripper. I just replaced mine and a new seam ripper makes the job much easier. Be sure to remove the small threads caught in the fabric.
Step 8: Admire Your Handiwork

At this point I like to unzip my zipper and clear away any loose threads, while admiring the fact that the waistlines match and the zipper looks pretty straight!
I hope this was helpful, and seeing as how it's my first tutorial, please provide some feedback. Again, this is what works for me. It's a few more steps but it ensures a nice even zipper.
Give the zipper a nice finger press, or run a warm iron over it.
Your zipper is now ready to be stitched.
Step 6: Stitch Your Zipper
Install your regular zipper foot. My machine (Brother PC-420) has a left and middle needle position. As shown, the needle is in the left position. If it were centered, the needle would fall directly in the groove. Choose the one that works best for you. I find this one easier to use to navigate around the zipper pull.
I start at the top of the zipper on the right side, stitching along my marks on my zipper. Take your time and follow the line all the way down to the end of the zipper.
Pivot where you want the zipper to stop, and stitch over the zipper teeth. Go slowly as you move over the teeth. This is the Colette Hazel pattern. My zipper is 22" but I find 16-20" works well for this style. You can clip the tail later.
Pivot again and stitch the other side following your marks.
Step 7: Press & Rip Basting
At this point I like to press on the right side of the garment with steam. I don't linger at any one area, but a smooth press secures those stitches.
Unpick your basting stitches with a seam ripper. I just replaced mine and a new seam ripper makes the job much easier. Be sure to remove the small threads caught in the fabric.
Step 8: Admire Your Handiwork
At this point I like to unzip my zipper and clear away any loose threads, while admiring the fact that the waistlines match and the zipper looks pretty straight!
I hope this was helpful, and seeing as how it's my first tutorial, please provide some feedback. Again, this is what works for me. It's a few more steps but it ensures a nice even zipper.
Are you confident when it comes to zippers? Feel free to share your favorite tips & tricks!
No comments:
Post a Comment